

In this technical blog, we will look at the past performance of 4 hour Elliott Wave Charts of EURNZD, which we presented to members at the elliottwave-forecast. In which, the pullback from 18 June 2021 high unfolded as a double three structure & showed a blue box area. A green right side tag suggested buying opportunity in the pair looking for the next leg higher or for a 3 wave bounce at least. We will explain the structure & forecast below:
EURNZD 4 Hour Elliott Wave Chart
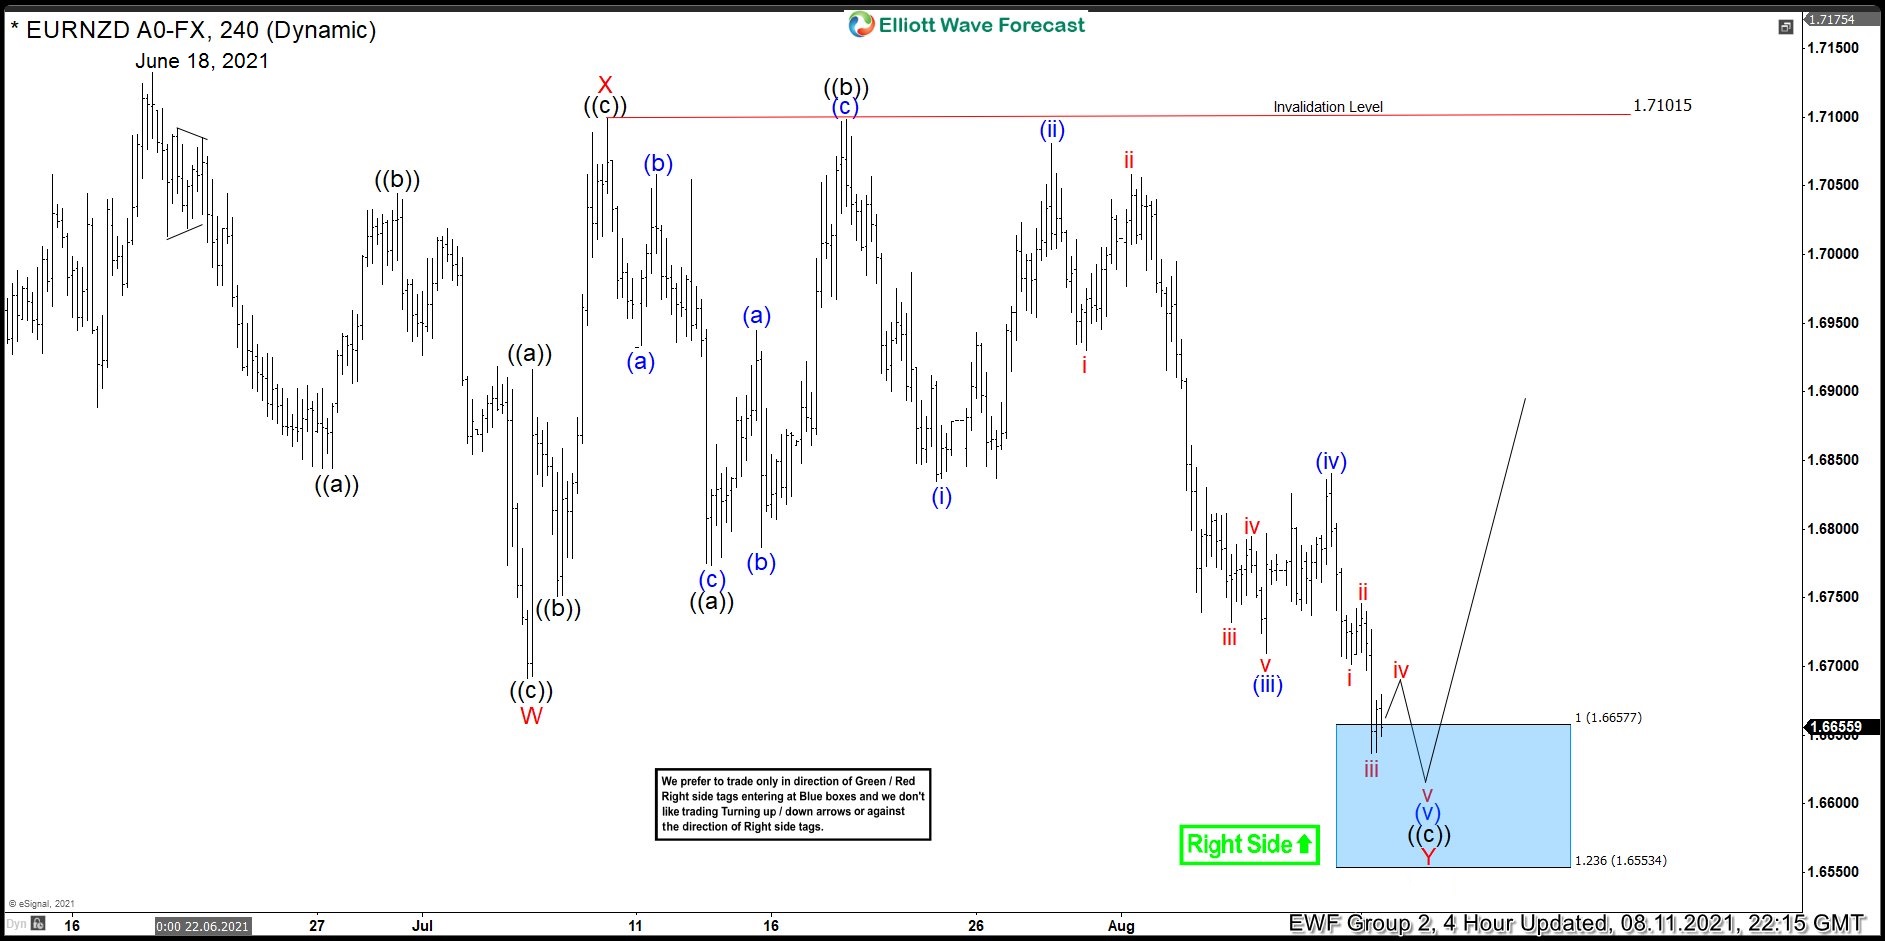
Here's 4hr Elliott wave chart of EURNZD from the 8/11/2021 update. In which, the pullback from 6/18/2021 high unfolded as Elliott wave double three structure where wave W ended at 1.6691 low. Wave X bounce ended at 1.7101 high and wave Y managed to reach the blue box area at 1.6657- 1.6553. From where buyers were expected to appear looking for more upside or for a 3 wave bounce at least.
EURNZD Latest 4 Hour Elliott Wave Chart
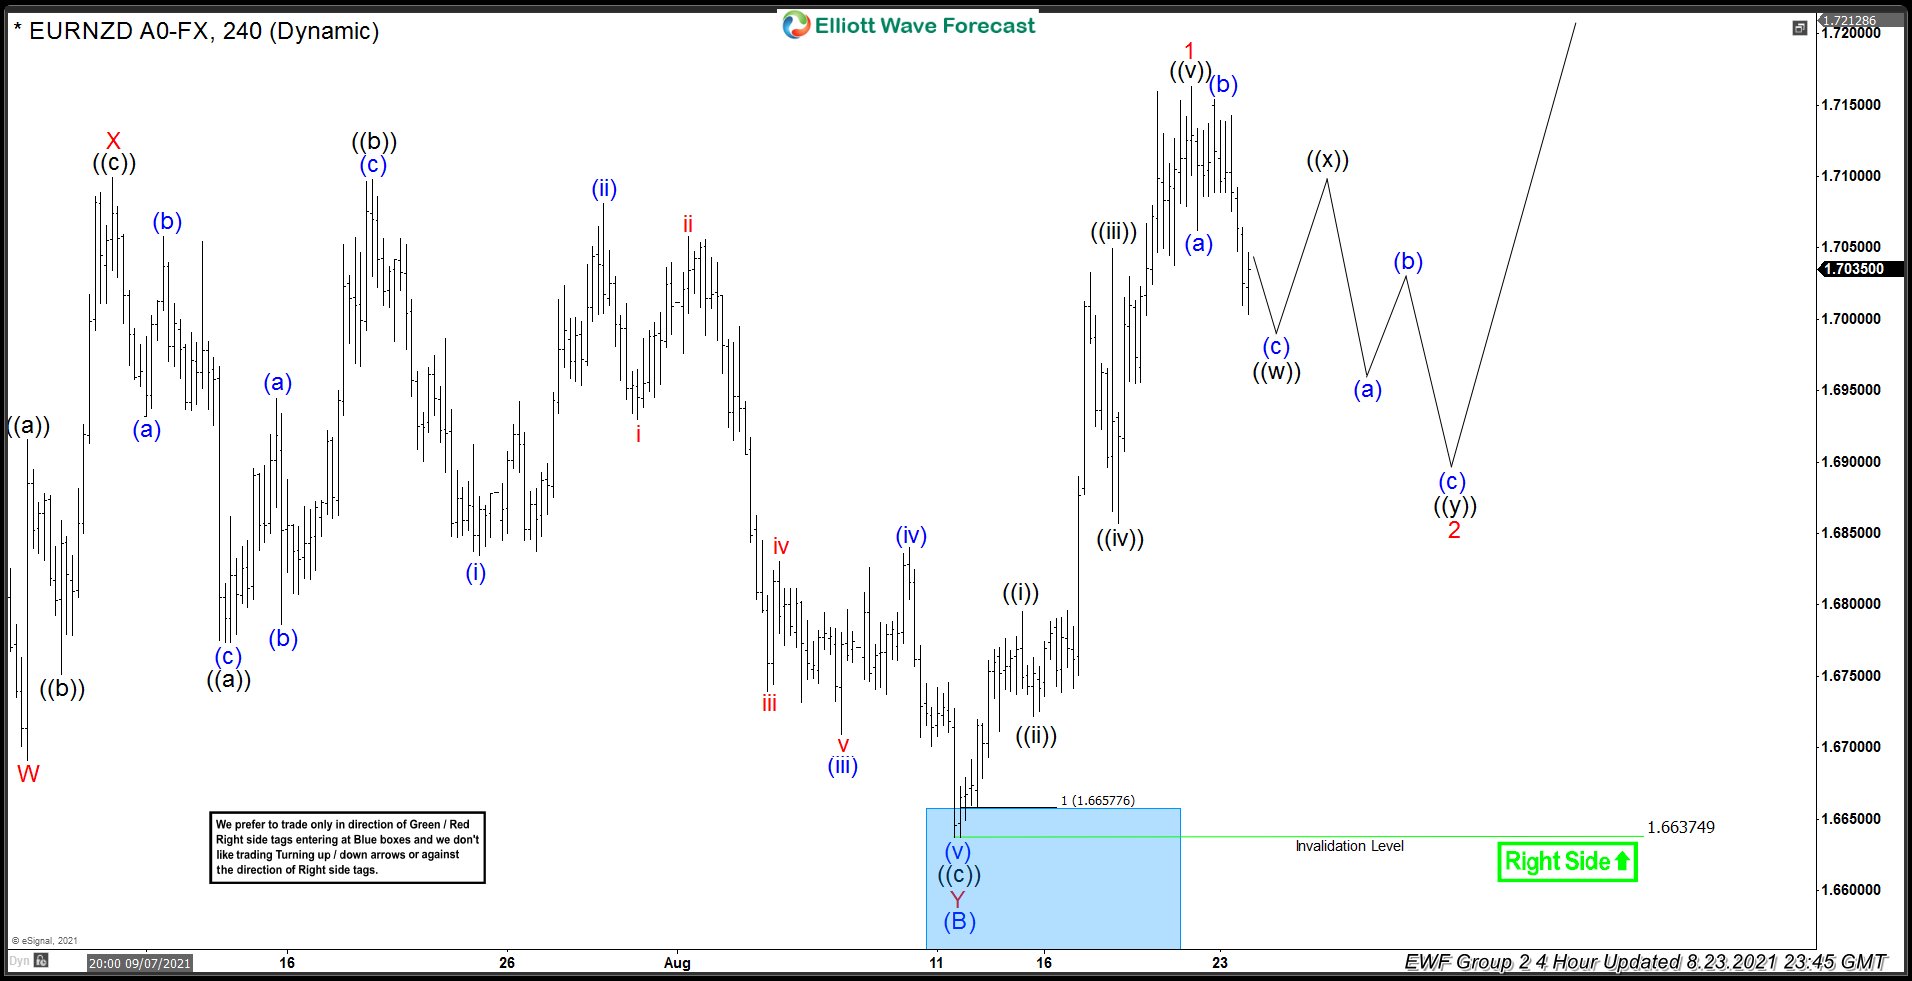
Here’s the 4hr Elliott wave chart of EURNZD from the 8/23/2021 update. The pair is showing a strong reaction higher taking place from the blue box area after ending the double three correction at a 1.6637 low. Allowed members to create a risk-free position shortly after taking the long positions at the blue box area.
Source: https://elliottwave-forecast.com/forex/eurnzd-bouncing-strongly-blue-box-area/



Comments
Log in or sign up to join the conversation.